-
Cloudpos Bedienen
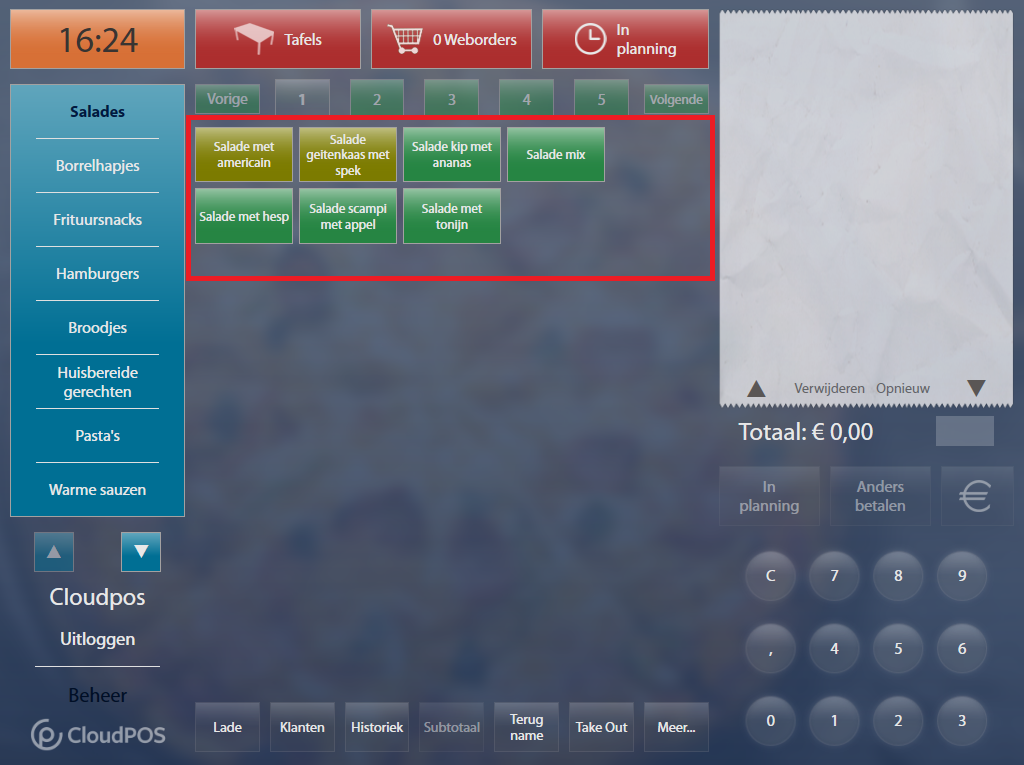
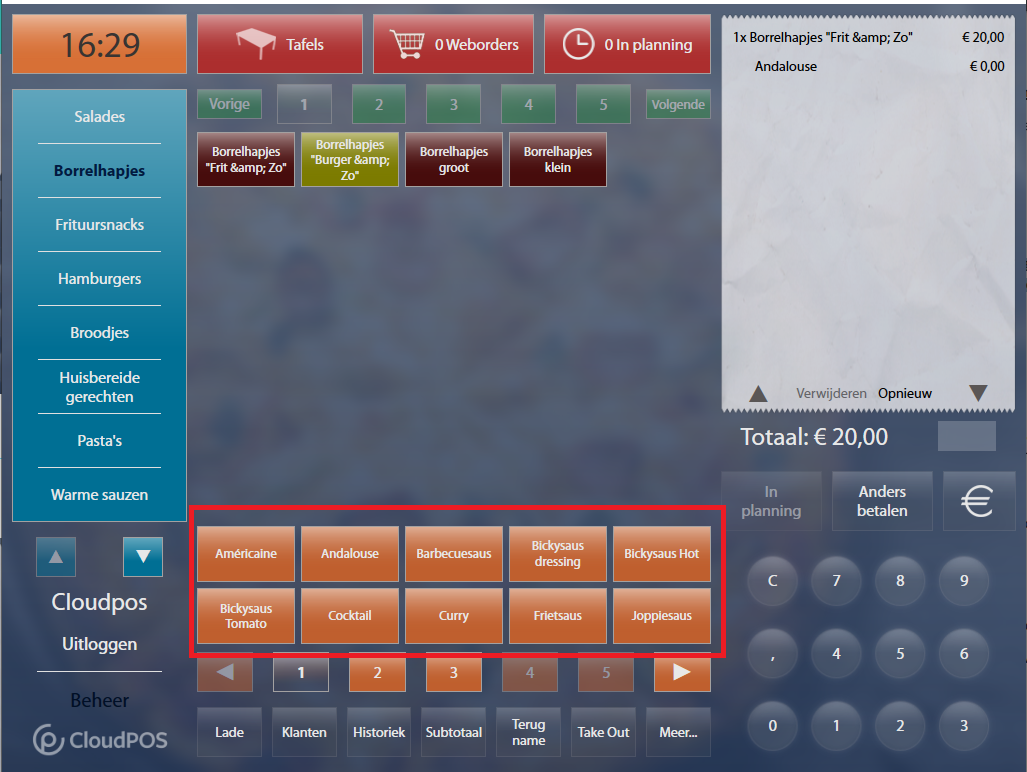
- Categorie, product en subproduct
- Subproducten
-
Cloudpos Bedienen
- Instructie video
- Tafel Verkoop Index
- Kassa knop index
- Categorie, product en subproduct
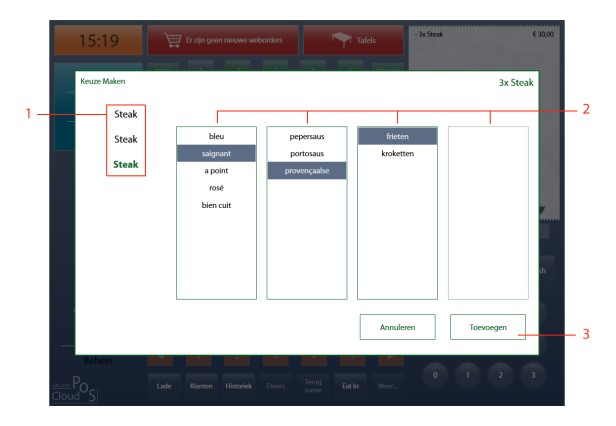
- Extra opties popup
- Optie Popup – instructie video
- Wisselgeld teruggave zien
- Korting geven
- NR,NS uitleg
- Personeel ticket
- Tickets niet altijd Afprinten
- Kassa Optie Knoppen
- CloudPOS Prikklok Gebruiken
- Werken met Optie Pop-up
- Menu-optie
- Werken met My Freedelity
- Cloudpos Kassa Aanpassen
-
Cloudpos Webpanel
- CloudPOS Webpanel Gebruikersbeheer
- CloudPOS Prikklok Rapport via webpanel
- CloudPOS Webpanel: Pop-up subproducten configureren
- CloudPOS Webpanel: Producten configureren met opties
- CloudPOS Webpanel: een product aanmaken met open prijs
- CloudPOS Webpanel: Menu-optie
- CloudPOS Webpanel: Product met aantallen configureren
- Cloudpos Webshop
-
Control Cloudpos
- Categorie, product en subproduct
- Subproducten

1. Categories
2. Products
3. Products Navigation Bar
4. Notification bar new web orders
5. Table selection
6. List of products already chosen
7. Click in the list of products already chosen and then on delete to correct
8. Clear the entire list with already selected products
9. When the list of selected products becomes too long, you can scroll with the arrows
10. Pay by bank transfer
11. Cash checkout
12. Numeric keypad for entering: number of times the product, amount received
13. Sub-products
14. More options
15. Switch VAT rate, Eat in and Take out
16. Takeback function to take back incorrectly sold products
17. Divers can be used when a product is not in the checkout
18. Review the latest orders and correct if necessary
19. Customers: create a new customer, search for a customer by address, phone, name or surname
20. Open drawer
21. Sub-product navigation bar
22. Manage button to go to checkout customize screen
23. Log out current user
24. Current User Logged In